I've got my allotment now.
What should I know?
There are a gazillion books on the market now, from the ultra-trendy to the old fuddy-duddy, on how to start off with a new allotment. We are not going to duplicate any of that information here. Here there are some useful tips, a bit of local know how, and a few do's and don't's which are specific to allotments in Ashford.
Important do's and don'ts you need to know . . .
Lets get the really tedious stuff over and done with first, eh? Nobody likes this bit, but you've got to do it before you can get on with the fun bit . . .
CLEARING THE PLOT
- There was a time when the council used to weedkiller your plot then plough it for you. They don't do this anymore, and anyway it wasn't as much help as it sounds. Perennial weeds weren't always eradicated and the ploughing just spread them through the whole plot, as well as leaving a real mess. Better to do it yourself . . .
- You need to get started on your plot as soon as you can. Plots are in demand - as you of course know - and you need to show you are serious and prepared to put the work in. No-one expects miracles, but if you do nothing or only make a token gesture, you risk having the plot taken way and given to someone else. If there is a sensible reason why you cannot start straight away, let the council know.
- You are allowed to use weedkiller to clear an overgrown plot, but you need to be very careful indeed that spray does not drift onto neighbours' plots. Use a watering can rather than a spray; keep a separate can and don't use it for anything except weedkiller. Use any weedkiller which contains glyphosate (there are several brands); this will kill the roots of perennial weeds. Do not use any weedkiller designed for paths or drives. Follow the directions carefully. When mixing weedkiller, ALWAYS bring clean water from the tap to your plot, rather than mixing the weedkiller near the tank and carrying it across the site to your plot.
- You can use a weed-suppressing fabric to cover all or part of your plot and smother weeds - this is an excellent method of tackling an area you can't get a spade into yet. However choose what you use with care. The council does not permit plotholders to use old carpet, for a number of very sensible reasons. Narrow strips of 'weedproof membrane', as sold in rolls at garden centres, are poor value for money. They don't go nearly as far as you think, tend to blow around, and are too weak for perennial weeds. Tarpaulins or other builders products will not kill weeds as they let too much light through. A really good solid weed-proof product is available at a reduced cost from the Trading Store; this really works and lasts for years, so you can move it round the plot as you are ready to clear it.
- Disposing of perennial weeds is something there is a bit of confusion about. Some books will tell you never to put them on compost heaps. In fact a reasonably well-made compost heap will kill off almost all perennial weeds except bindweed, and any that survive are easily seen when you turn the heap out - just chuck them back to compost again as a second go will normally do the trick. You really, really must not take them off the site in binbags and take them to the dump. You will be losing valuable topsoil and destroying nutrients (also it's against the regulations). If you don't want to risk perennial weeds making themselves too much at home in your compost heap, put them in a sealed black bag to die instead, or leave them exposed to the sun to dry out - then compost them. Covering your compost heap when it's full helps too.
- You may find a lot of rubbish on your new plot. The council does not have the resources at the moment to clear plots of rubbish or provide skips except in exceptional circumstances. Where possible, you can take more manageable items home and dispose of them on bin day. Larger items should be taken direct to the Household Waste Depot. This is open every day from 8am to 4.30pm on weekdays and 9am till 4pm at the weekend, except Christmas Day. If you don't have a car and will not be able to rope in a friend to take stuff to the dump, contact your rep or this website and if possible something will be worked out. Click here to go to the KCC "dump" page
WHAT CAN I GROW . . . THERE'S ALL THIS STUFF IN MY PAPERWORK FROM THE COUNCIL. CAN I REALLY NOT GROW RHUBARB???
(There is currently a technical hitch installing links. To go to the council page with the conditions, cut and paste the link to your address bar) - http://www.ashford.gov.uk/allotments
or click here to see a copy of them on this website
or click here to see a copy of them on this website
- Yes you can. There are obscure legal reasons why you need to ask permission to grow rhubarb, asparagus or fruit bushes; we won't bore you with them here.
- In fact the council is usually quite happy for allotmenteers to plant asparagus, strawberries, rhubarb, blackcurrant redcurrants and whitecurrants, raspberries, blueberries or loganberries - and all such similar small scale stuff.
- You are not, however, allowed to plant fruit trees. Or, as one chap did, ten wisterias. This is just taking things too far and, of course, a fruit tree is not an easy thing to remove after a few years - unlike a gooseberry bush.
- Fruit bushes, rhubarb, and so on shouldn't take up too much of your plot or be allowed to become neglected and overgrown with weeds. You are expected to take as much care of these crops as you would of any others.
- You aren't supposed to sell produce you've grown on your allotment. This rule is there to stop people running an allotment as a commercial enterprise. Allotment surpluses are sometimes sold at fund-raising events for local charities, and if you want to do this no-one would object. If you want to use your produce for, say, a small business making jams and chutneys, you'd need to talk to the council. And, of course, you can always do as much bartering as you like . . .
|
Top tips on the best crops to choose for a smaller plot are in our ADVICE & INFORMATION SECTION - click here to go to the article
If you've lost your copy of the council's conditions, click here to go to them.
If you've lost your copy of the council's conditions, click here to go to them.
USEFUL TIPS: learn from other people's mistakes, not your own!
RIGHT AT THE START
|
- DON'T GO AT IT LIKE A PIG AT A 'TATER. If you're not used to heavy manual work, you need to build up your muscles gradually - otherwise it is quite likely you'll injure yourself, and you'll not get your patch cleared when you have a slipped disc!
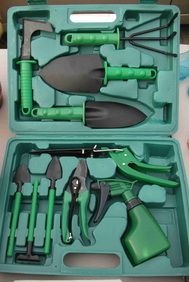
- A SMALL SPADE AND FORK WILL SERVE YOU BETTER THAN A BIG ONE AT FIRST. It's better to make many movements with a smaller, lighter spade or fork, than a few small ones with a big one. You'll be able to work for longer and get more done overall.
- GET GOOD QUALITY, LIGHTWEIGHT TOOLS. Cheap tools are often heavy with solid metal handles. Flimsy trowels, hoes and rakes will make the job harder, and irritate the heck out of you. Bootfairs are an ideal source of cheap tools, but check them over well for woodworm or metal fatigue before parting with that hard-earned £1.50!
- REMOVE ALL PERENNIAL WEED ROOTS BEFORE YOU PLANT OR SOW. Couch grass is the worst offender - every bit of root will make a new plant. Either use a glyphosate weedkiller before digging, or remove white, easily visible roots by hand as you fork the soil over. Either method works equally well.
AS YOU GET STUCK IN
DON'T LET WEEDS GET THE UPPER HAND . . .
- A new plot may have a lot of weed seeds in the soil, especially if it was neglected before you took it over. These will keep on germinating as you turn the soil over. DON'T PANIC! Turn the situation to your advantage - the weeds that spring up will be mostly annual ones, and if not they're still just babies. Get them out and on the compost heap before they get their feet under the table - they are valuable organic matter! Don't worry about what you've read about not composting weeds, these'll rot down in no time.
- Weeds will rob your veg of valuable food and water, leaving you with stunted, disappointing specimens. If you let your weeds flower and go to seed, you are multiplying your enemies a million-fold.
- The best way to keep weeds under control is with a hoe - cut them through at ground level while they are still small and they will die. "Keep the hoe constantly moving between the rows", say the old books. Eh? Get a life! Take the advice of a practical gardener who used to say "Never let it see a Sunday" - in other words, hoe at least once a week. You won't even have to clear them up; the worms will drag the cut bits into the soil to add to your humus. The best time to hoe is on a sunny or windy day, after rain when the soil is soft. If you get such an opportunity, whatever the time of year, get your hoe out! For more about hoes, check out our TOOLS SECTION
- KEEP YOUR EDGES CUT because letting the edge of grass paths get shaggy will result in grass encroaching on your vegetable beds. Also slugs love to lurk under grassy edges in the daytime, coming out at night to nibble yer veg.
PLAN FOR CROP ROTATION RIGHT AT THE START
It's easy to get carried away in the rush to get crops in the ground at the earliest opportunity. But planning out how your allotment will be laid out can be done before you've finished clearing it. In fact, it makes little sense to carefully dig and weed bits which will, in the end, be grass paths - much better to lay these out and set them aside at the start.
Crop rotation helps you make the best of soil fertility, but it's most important function is to avoid disease and pests. And boy, do you want to avoid disease and pests!!! Nothing is more heartbreaking than to see a promising crop laid to waste (sometimes with dreadful irresistible slowness, sometimes just overnight) so thinking 'crop roation doesn't need to apply to me' is very foolish.
It is very difficult, if not impossible, to remember how to rotate your crops unless you divide your plot up into beds. There are three-year systems and four-year systems, each equally valid. Which you decide to use may depend on the shape of your plot; a long thin plot is easier to divide into three, a squarish one conveniently goes into four. Lay out your beds with string very early on - your first day, perhaps? Click here to go to more info about crop rotation.
HERE'S A CLEVER TRICK WHEN CLEARING A NEW ALLOTMENT - ESPECIALLY IF YOUR SOIL IS A BIT LUMPY AND HARD!!!
Use a bulk bag (the kind that come with builder's supplies in) Set it up in a difficult corner (but a sunny one) and use it as a compost heap. As you clear your plot, fill it with all your allotment and garden waste (anything can go in, even weeds, but not just grass clippings on their own) until the early part of the winter. At Christmas, cover the top with old compost sacks to keep everything snug and stop anything growing.
In the spring, level off the contents and firm them well down. Cover with a 6" thick layer of soil or bagged compost, and fold down the outside to just above the level of the soil inside. Plant 4 courgette, squash or cucumber plants at the corners. They will root into your compost heap, spill attractively down the edges, and be at a comfortable height to pick. By the autumn, when you take the plants out, the compost inside will have rotted down quite a lot.
Once cleaned of the courgette and squash plants, fold the top down further to take account of the rotting down, and add a little more soil or bagged compost on top, and mix in some general purpose fertiliser like pelleted chicken manure. Sow with winter salads, spring onions and maybe some herbs. In March add some more lettuce seeds and some radishes.
Meanwhile, on a sunny windowsill, have some climbing french beans or runner beans growing on in little pots. In late May, take out the last of the overwintering and spring salads and tidy the soil up. Add some more fertiliser, slot canes into the perimeter, tie them in the middle to make a wigwam, and plant out your beans. They will love the moist, squishy compost and give you a good crop.
Once the beans have finished, tip out all the contents and use to mulch or dig into your soil!


