What is a 'fine tilth' anyway, I hear you ask . . .
Yes, a 'fine tilth' is what we are urged to 'reduce' the soil to before sowing seeds. You've heard of 'tilling the soil' possibly; well when you've tilled it, a tilth is what you get. In theory . . .
Of course, if you've a plot at one of the sites with light, sandy soil, like Westrees, you may wonder what the fuss is about. You dig the soil, you rake it, and Bob's your uncle.
If you're on one of the clay sites, the whole business gets a lot trickier. If you've recently taken on an allotment on clay, you may despair of ever seeing that 'fine tilth' on your plot. These words of comfort are for you, not the lucky allotmenteers who are blessed with light, friable soils.
If you're on one of the clay sites, the whole business gets a lot trickier. If you've recently taken on an allotment on clay, you may despair of ever seeing that 'fine tilth' on your plot. These words of comfort are for you, not the lucky allotmenteers who are blessed with light, friable soils.
Like the Irishman when asked for directions, I have to reveal that, if you are reading this in spring, "you shouldn't start from here". The secret of breaking up clay soil starts in autumn. But after the winter we've just had, all bets are off anyway, and the boy scouts who rough-dug their soils last autumn are little better off than those who didn't. I hope that's some consolation.
Starting now, in the spring, what can you do?
Start with stage one - breaking up the soil.
ROTOVATING is one answer. You need to get the rotovator on when the soil is dry enough not to clump together, but before it dries out to a hard concrete-like crust. If you don't have a rotovator, you might be able to persuade an allotment neighbour to rotovate your patch in exchange for some petrol or other barter. The rotovator will need to go over the soil repeatedly.
FORKING OVER is the traditional, low-tech approach. Stick the fork into the soil as deeply as you can, lift a forkful of earth, and fluff it up by sticking the tines into it and twisting or shaking the soil (hard to describe, but obvious once you try it). If the soil is dry enough, you can beat the lumps down to smaller ones by bashing them with the tines. Don't, as the books say, use the backs of the tines on clay soil - you may only hammer the lumps flat. Use the pointy side and aim to hit the lumps with the tips of the tines. Once you've done this for a bit, you'll understand why the rotovator was invented.
Stage two - breaking it up further.
CULTIVATOR is a term used to cover a range of devices which break the soil up. Every firm has their own and there are several broad categories.
Three-pronged cultivators with little plough-like tips to the spikes.
Three-pronged cultivators with smooth sharp pointed tips.
'Canterbury hoes' with two or three sturdy prongs at right angles to the handle.
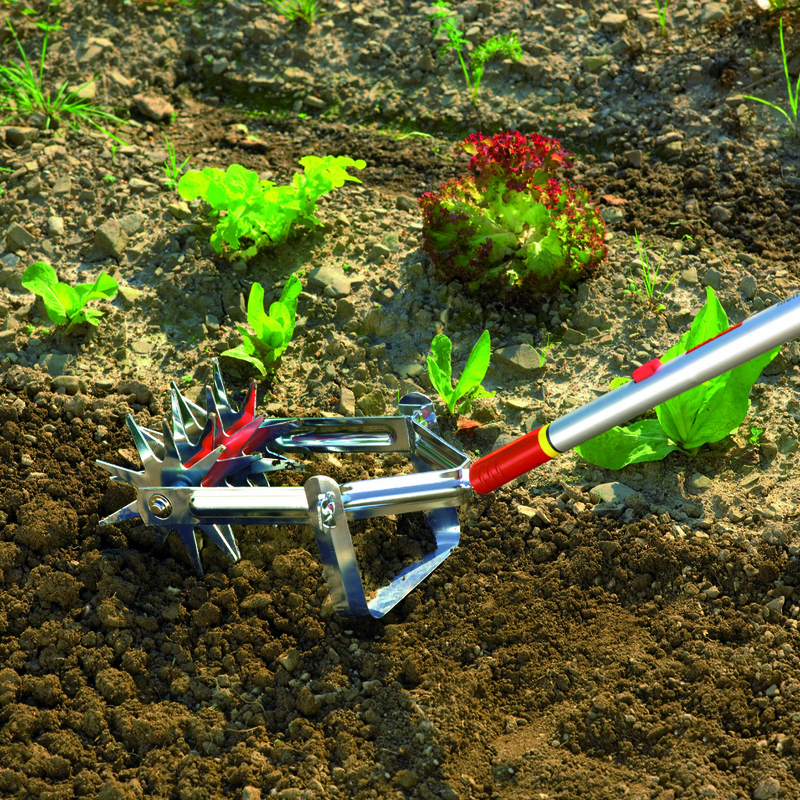
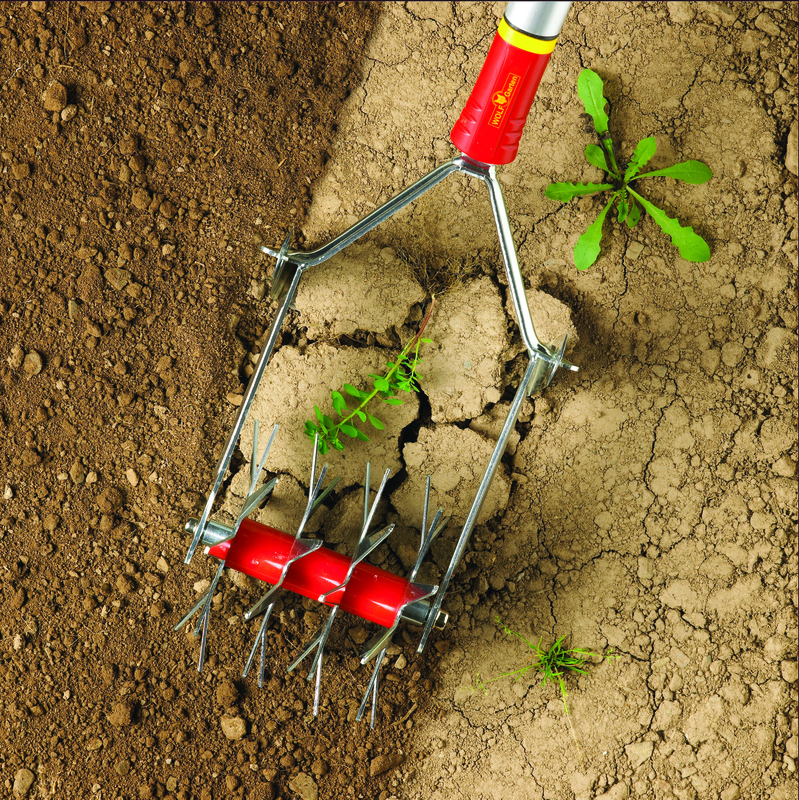
Rotary cultivators with spiked wheels which turn and chop the soil up.
All of these work by running repeatedly over the soil chopping and crumbling the lumps. The three-pronged type with smooth pointy tips doesn't work on clay soil though it is excellent on light soils.
After years of experimentation the website compiler's preferred choice for any soil, including heavy clay, is the Wolf 'Soil Miller' (click here to go to the page on their website) which really stands head and shoulders above all the others. Unlike some of them, it doesn't give you tennis elbow from bashing as it has a rolling action. It aerates the soil really well and is splendid later in the season for hoeing up the soil between the rows. Cheap it ain't, of course. But mine has earned its keep a thousand times over and it is perhaps the best buy I ever made in the tool line. After all, it is a lot cheaper than a rotovator and much easier to store! Once you have the multi-change handle, you can buy any number of other useful attachments, from hoes to pruning saws!
Stage three - at last! - the fine tilth . . .
This is the easiest bit. You'll need a RAKE. That's it, just a rake. You can break up the last few bits by stamping on them with the head of the rake, holding the handle vertically. Or you can just rake the lumpier bits out of the way to the end of the row or off to one side, leaving the finest stuff where you are going to sow. Hooray!
Still not convinced you've got a 'fine tilth'? Me neither, often as not. How fine it needs to be depends on what you are sowing. Large seeds, like peas and beans, will cope with bits the size of a sugar-lump as long as there is a bit of fine stuff in there as well. But carrots, lettuce and so on need something not far off the consistency of potting compost. So what do you do?
CHEAT! that's what. Try sieving some soil over a bucket or old washing up bowl to get some fine stuff. You can mix this with bagged compost to improve the texture further. Then "make your drill" at a little deeper than the seed packet suggests. You do this by dragging a hoe, trowel or the corner of the rake through the soil leaving a V-shaped groove. Now line this groove with enough of your sieved mixture, and water it to settle it down and give the seeds a good chance. If it all washes down a bit, add a bit more sieved mixture. Then sow your seeds at the required depth, and cover them with more of the sieved mixture.
NOW COVER YOUR SEED ROW WITH NETTING OR SOME OTHER PROTECTION!
Birds will try to eat your seed, and the local cats may well look at your 'fine tilth' and think "Aha! Some kind soul has prepared me the perfect ablutions". Better be prepared than come back and find your hard work spoiled.


