Some allotment sites have lovely soil. Some have dry, sandy soil; others have heavy lumpen clay. Improving your soil may be a luxury or an essential step to growing anything decent. All books on growing vegetables will give you plenty of advice about double digging, bastard trenching, the correct care and cossetting of your compost heap, and the advantages of adding a foot-thick layer of well-rotted manure to the plot each year. Dream on . . .
How to improve your soil . . . in the real world
Let us assume, for the sake of argument, that you aren't a millionaire or a Hercules. You can't afford to have well-rotted manure delivered by the ton, and the thought of shifting several tons of earth to carry out proper double digging as per the books leaves you feeling a little fragile. The instructions for composting would consume about half the space on your plot. What are the alternatives?
These tips are based on local experience. You won't find them in the usual books.
In this section: how to compost without a compost heap, where to get extra organic matter without cost, what kind of compost heap to have and how to get your heap rotting away well.
TRENCH COMPOSTING
This technique has the great advantage of cutting out the entire middle part of the composting process. It can be used when you are clearing a plot, or when preparing the soil for RUNNER BEANS, COURGETTES, CUCUMBERS OF SQUASH.
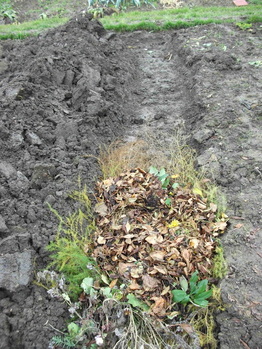
Dig a trench across the patch you intend to use, making it roughly 2-3ft (60cm-1m) wide. Go down until you reach subsoil - you'll recognise this because it is denser, and usually lighter in colour. Using a fork, roughen up the subsoil bottom very slightly - no need to break your back. The soil you've taken out of this hole will look like a lot more than what you would expect to fit; pile it on one side or on either side of the hole.
|
Fill your trench with any organic matter you can get your hands on - spud peelings, grass clippings, dead-headings from the garden, fresh manure picked up by the bag. (See below - "Foraging for organic matter"). The only things you shouldn't put in are:
|
You should leave your trench to rot down for at least 4 months before planting on the top. Leave it for longer if you are putting other plants such as potatoes or peas in.
Do not use this technique to prepare the ground for cabbages or their cousins like sprouts or kale. The cabbage family like firm soil, and can follow your peas and beans after the compost trenches have rotted right down.
Do not use this technique to prepare the ground for cabbages or their cousins like sprouts or kale. The cabbage family like firm soil, and can follow your peas and beans after the compost trenches have rotted right down.
GRAB ORGANIC MATERIAL WHERE YOU CAN
You will, of course, have the waste organic matter from your allotment; if you have a garden, you'll have any lawn mowings or dead-headings, weeds and swept leaves, from your garden. But you always need more!
Talk to any neighbours who have lawns and, if they don't run a compost heap themselves, ask them if you can have their lawn mowings. NOTE: ask them if the use lawn weedkiller! If they have used say, a 'feed weed and mosskiller' you need to avoid their mowings for a period afterwards. usually this is something like 3 cuts.
Kids next door have a rabbit? Ask for the clearings from the cage. Or if a friend keeps chickens, the clearings from the run.
Torn up newspaper, well soaked, is a welcome addition to the humus levels. Tear it into thin strips (go with the 'grain') and mix it in with other materials of a different texture for best results.
Oh, and that old legend about peeing on the compost heap? Sorry, it's true . . . you should. Although this is one area where it will be hard to get the neighbours involved . . .
A HAPPY MEDIUM WITH COMPOST HEAPS
Serious gardening books suggest you have about 5 acres of compost heaps, which you turn lovingly every day and feed with currant buns (well, we exaggerate slightly). At the other extreme, you can buy plastic composting bins about the size of the average dustbin; full before you know it. So where is the happy medium?
Serious gardening books suggest you have about 5 acres of compost heaps, which you turn lovingly every day and feed with currant buns (well, we exaggerate slightly). At the other extreme, you can buy plastic composting bins about the size of the average dustbin; full before you know it. So where is the happy medium?
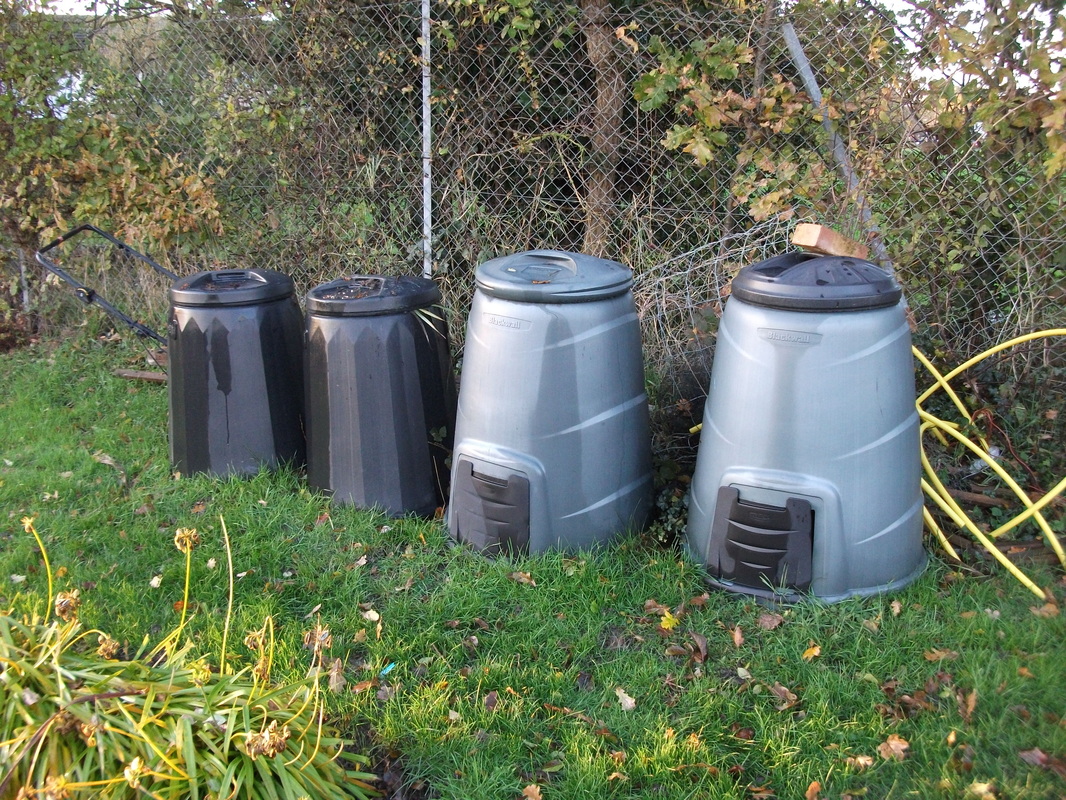
PLASTIC READY-MADE BINS may be the answer if you have a very small plot. Do not place any faith in the suggestion that you open a little door at the base and shovel out the fully matured compost from the bottom. This doesn't work well. You need to be able to turn the whole heap out properly. This means you'll need more than one bin - three is about right, even for a titchy plot. The black or dark green plastic warms up well and creates the hot conditions which rot down things quickly, but even so it will be about a year before your compost is quite as you'd like it.
Make sure the bins are on open soil so the worms can get in. If the bin comes with a plastic bottom don't use it. Some people worry about rats; they are rarely a problem if you take care not to put cooked food or bones in the heap. Fill the first bin, adding more stuff as the level drops. Every so often scatter a layer of pelleted chicken manure or fresh horse poo. Every other 'so often' add a sprinkling of lime (see LIME - WHAT DOES IT DO). This will get things moving along nicely. After a while, you'll be just able to get no more in. At this stage, you need to set that bin aside and start the next one. Don't be tempted to put more stuff in the top as the level drops! If you do, you'll end up with unrotted stuff at the top when you want to use the nice well-rotted stuff at the bottom.
If you're clearing an allotment for the first time, you'll end up with a lot of stuff. Some can be rotted by the trenching method above. Or you can leave it out in the weather to wilt down so when it goes in the bin it doesn't take up so much space.
Because the bins get so hot, and have lids to keep the light out, you can put pretty much anything in them - seeds and perennial roots will be killed. Anything which survives the rotting process can be fished out when you empty the bin and popped in the top of the one you're currently filling.
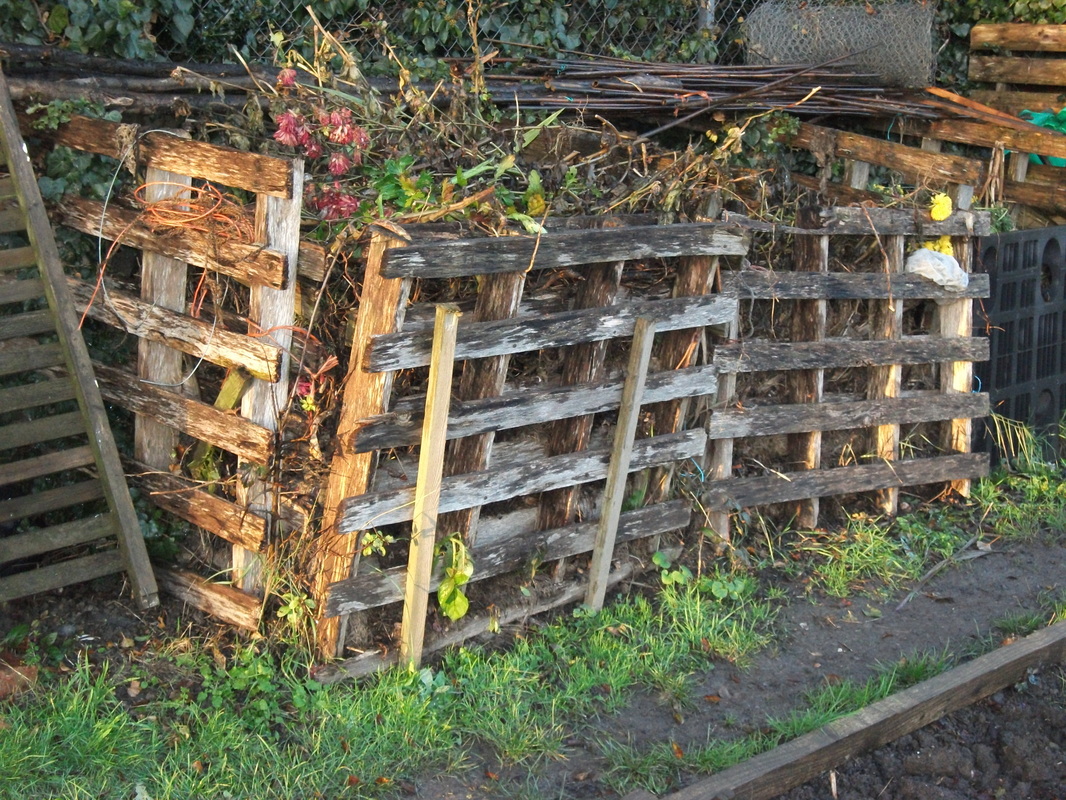
A LARGER HEAP CAN BE CONSTRUCTED FROM RECYCLED MATERIALS though the principle for filling it, and for helping decomposition with regular feedings of manure and lime remains the same, a traditional heap will rarely reach the temperatures a plastic bin will. You'll need to leave stuff a bit longer, and make sure persistent weed roots are dried out well before putting them in.
Ideal materials for larger compost heaps include old doors (timber ones, not modern plywood jobs), old fence panels, bits of shed that have seen better days and can be cut down, and pallets. Corrugated iron is traditional but can be nastily sharp when it goes rusty! Don't use plywood or MDF, it will disintegrate. Make sure the sides are well secured; the outward pressure will be considerable. Small pallets hold together in a good square shape and need only a bit of rot-proof string to secure them, but the holes in the sides let the heap dry out too much and you might want to line them with heavy-gauge cardboard boxes (which will rot down to form part of the heap) or old plastic compost sacks staple-gunned to the inside (not the outside!).
Just as with the plastic bins, you'll need more than one heap. But with larger heaps, you'll only need two in total, even if you have biggish plot. Once you have filled a heap for a year, cover the top to keep moisture in and exclude light - sturdy weed-proof fabric from the Seed Shed is ideal and pretty cheap, as it will last forever.
HOT COMPOSTING - NEW PRODUCT
The HotBin is a new product which aims to retain the heat caused by bacteria action, running the heap at 40-60degC even during winter. This will turn out the kind of compost you'd wait years for in 3 months or less. If you have a small allotment, or want to have a discreet comost heap in your garden, the HotBin would be worth considering. It can take food waste as well as garden stuff, and is equipped with a biofilter and an airtight lid, so no nasty niffs to give away what it's up to. Unlike traditional composters, it can go on a paved surface. The price may make you gasp and stretch your eyes - can the canny allotmenteer make their own out of unwanted polystyrene, or floor insulation?
Click here to go to the HotBin website


